本文最后更新于:星期二, 八月 2日 2022, 9:32 晚上
使用 tf.data API 可以轻松处理大量数据,支持多样化的数据格式,还可以方便执行复杂的转换。本文介绍了不同类别源数据转化为 tf.data.Dataset 的方法,以及 Dataset 常见的预处理方法。
概览
最近几年我们在机器学习的加速计算领域取得了一些突破。虽然我们进行指标运算和矩阵运算所需的时间大大减少了,但是提供数据加速的CPU却没能跟上相应的步伐,这就成为了预处理中的瓶颈。我们本以为可以通过构建更复杂的模型来减少对硬件的需求,但是CPU的效率还是取决于他们拥有多少RAM。
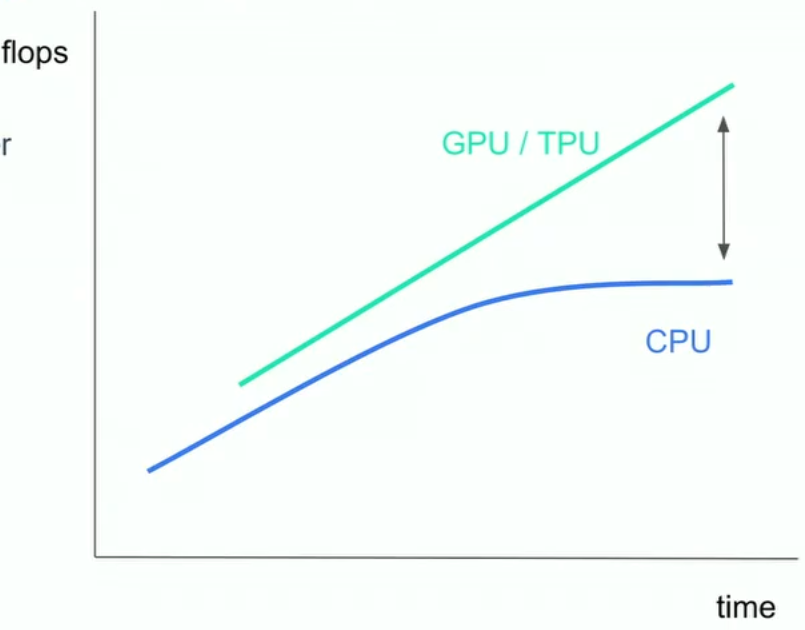
对于一些数据集很大的问题,解决问题的方法除了提升CPU的性能之外,还有对数据集进行分批次处理,但是分批预处理需要不断进行训练和合并操作,这对预处理增加了难度。tf.data 可以帮助解决数据集过大造成的预处理瓶颈问题。
tf.data 是tensorflow的数据预处理框架。它速度快、灵活且易于使用。
假设你的数据以TFRecord格式存在磁盘,需要将这些数据读取、处理并训练模型,可以先通过TFRecordDataset 开始处理这些数据:
dataset = tf.data.TFRecordDataset('.../*.tfrecord')
然后执行一些数据预处理操作,这个过程可能很消耗资源:
dataset = dataset.map(expensive_preprocess)
随后你需要打乱数据,以降低模型训练过程中过拟合的可能性:
dataset = dataset.shuffle(buffer_size=1024)
然后我们需要分批次,以令模型加速计算
dataset = dataset.batch(batch_size=32)
最终要完成pipeline搭建,这样可以保证模型在运行一个batch的数据时,另一批数据进行预处理以提升效率。
dataset = dataset.prefetch()
将数据输入到模型,我们可以开始训练了。
model = tf.keras.Model(...)
model.fit(dataset)
上面就是数据从读取到处理到训练的全部流程,称之为管道(pipeline)。
处理大量原始数据,要经过多次函数变换,这些函数变换都是可重用的。使用tf.data将这些变换整理成管道,一方面可以简化复杂输入的预处理过程,另一方面,由于Dataset 对象可迭代,可以执行分批处理。使用tf.data.Dataset可以方便地整合操作、构造数据集。
有两种方法构造可供训练使用的Dataset数据集:
- 从文件、内存中直接构建
Dataset - 从其他
Dataset中转化
如果打算从内存中读取数据构建 Dataset ,有 tf.data.Dataset.from_tensors() 和 tf.data.Dataset.from_tensor_slices() 可供选择;如果打算从 TFRecord 格式的文件中读取数据,可以调用 tf.data.TFRecordDataset() 。
当 Dataset 对象构建好了之后,通过使用 Dataset.map() 为其中每个元素施加变换、使用 Dataset.batch() 为整批元素添加变换等等对数据进行预处理。
从内存或文件中构造Dataset
从内存中的array构造Dataset
如果你的所有数据都在内存中,那么最简单构造 Dataset 的方式就是,先将其利用 tf.Tensor 转成tensor,后使用Dataset.from_tensor_slices()。
train, test = tf.keras.datasets.fashion_mnist.load_data()
images, labels = train
images = images/255

dataset = tf.data.Dataset.from_tensor_slices((images, labels))
dataset
从生成器构造Dataset
你也可以利用 Dataset.from_generator 从Python的生成器来构造 Dataset ,比如从 preprocessing.image.ImageDataGenerator 构造 Dataset。但这种方法受制于Python的GIL,因此效率不会太高。
首先下载花朵图片数据集,一共3670张花朵图片,分成五个类别。
flowers = tf.keras.utils.get_file(
    'flower_photos',
    'https://storage.googleapis.com/download.tensorflow.org/example_images/flower_photos.tgz',
    untar=True)
利用 preprocessing.image.ImageDataGenerator 定义数据增强操作,然后将其套用到花朵数据集上。
img_gen = tf.keras.preprocessing.image.ImageDataGenerator(rescale=1./255, rotation_range=20)
images, labels = next(img_gen.flow_from_directory(flowers))
最后构造 Dataset 。
ds = tf.data.Dataset.from_generator(
    img_gen.flow_from_directory, args=[flowers],
    output_types=(tf.float32, tf.float32),
    output_shapes=([32,256,256,3], [32,5])
)
ds
<FlatMapDataset shapes: ((32, 256, 256, 3), (32, 5)), types: (tf.float32, tf.float32)>
从TFRecord格式文件构造Dataset
有些时候数据不在内存中,而是以特定格式存在磁盘上,比如 TFRecord 格式。这种情况我们可以使用 tf.data.TFRecordDataset 作为数据管道的一部分。
# Creates a dataset that reads all of the examples from two files.
fsns_test_file = tf.keras.utils.get_file("fsns.tfrec", "https://storage.googleapis.com/download.tensorflow.org/data/fsns-20160927/testdata/fsns-00000-of-00001")

dataset = tf.data.TFRecordDataset(filenames = [fsns_test_file])
tf.data.TFRecordDataset API中,filenames 的输入很灵活,既可以是字符串,表明一个文件;也可以是字符串列表,表明多个文件。
从.txt格式文件构造Dataset
如果是 .txt 格式,那么采用 tf.data.TextLineDataset 也可转成 Dataset。
directory_url = 'https://storage.googleapis.com/download.tensorflow.org/data/illiad/'
file_names = ['cowper.txt', 'derby.txt', 'butler.txt']

file_paths = [
    'cowper.txt','derby.txt','butler.txt'
]
dataset = tf.data.TextLineDataset(file_paths)
看一下第一个文件的前5行:
for line in dataset.take(5):
  print(line.numpy())

b"\xef\xbb\xbfAchilles sing, O Goddess! Peleus' son;"
b'His wrath pernicious, who ten thousand woes'
b"Caused to Achaia's host, sent many a soul"
b'Illustrious into Ades premature,'
b'And Heroes gave (so stood the will of Jove)'
前五行都是 cowper.txt 中的。如果我们希望生成的 Dataset 能够轮流选取三个文件中的元素,可以在构造之初,使用 Dataset.interleave ,并设置 cycle_length:
files_ds = tf.data.Dataset.from_tensor_slices(file_paths)
lines_ds = files_ds.interleave(tf.data.TextLineDataset, cycle_length=3)

for i, line in enumerate(lines_ds.take(9)):
  if i % 3 == 0:
    print()
  print(i, line.numpy())

0 b"\xef\xbb\xbfAchilles sing, O Goddess! Peleus' son;"
1 b"\xef\xbb\xbfOf Peleus' son, Achilles, sing, O Muse,"
2 b'\xef\xbb\xbfSing, O goddess, the anger of Achilles son of Peleus, that brought'

3 b'His wrath pernicious, who ten thousand woes'
4 b'The vengeance, deep and deadly; whence to Greece'
5 b'countless ills upon the Achaeans. Many a brave soul did it send'

6 b"Caused to Achaia's host, sent many a soul"
7 b'Unnumbered ills arose; which many a soul'
8 b'hurrying down to Hades, and many a hero did it yield a prey to dogs and'
有的时候我们不希望录入文件的第一行,或者只要文件中满足要求的特定行,可以分别使用 Dataset.skip() 和 Dataset.filter() 。比如下面的泰坦尼克数据集,去掉第一行后,筛选生存下来的人。
titanic_file = tf.keras.utils.get_file("train.csv", "https://storage.googleapis.com/tf-datasets/titanic/train.csv")
titanic_lines = tf.data.TextLineDataset(titanic_file)

for line in titanic_lines.take(10):
  print(line.numpy())

b'survived,sex,age,n_siblings_spouses,parch,fare,class,deck,embark_town,alone'
b'0,male,22.0,1,0,7.25,Third,unknown,Southampton,n'
b'1,female,38.0,1,0,71.2833,First,C,Cherbourg,n'
b'1,female,26.0,0,0,7.925,Third,unknown,Southampton,y'
b'1,female,35.0,1,0,53.1,First,C,Southampton,n'
b'0,male,28.0,0,0,8.4583,Third,unknown,Queenstown,y'
b'0,male,2.0,3,1,21.075,Third,unknown,Southampton,n'
b'1,female,27.0,0,2,11.1333,Third,unknown,Southampton,n'
b'1,female,14.0,1,0,30.0708,Second,unknown,Cherbourg,n'
b'1,female,4.0,1,1,16.7,Third,G,Southampton,n'

def survived(line):
  return tf.not_equal(tf.strings.substr(line, 0, 1), "0")

survivors = titanic_lines.skip(1).filter(survived)

for line in survivors.take(10):
  print(line.numpy())

b'1,female,38.0,1,0,71.2833,First,C,Cherbourg,n'
b'1,female,26.0,0,0,7.925,Third,unknown,Southampton,y'
b'1,female,35.0,1,0,53.1,First,C,Southampton,n'
b'1,female,27.0,0,2,11.1333,Third,unknown,Southampton,n'
b'1,female,14.0,1,0,30.0708,Second,unknown,Cherbourg,n'
b'1,female,4.0,1,1,16.7,Third,G,Southampton,n'
b'1,male,28.0,0,0,13.0,Second,unknown,Southampton,y'
b'1,female,28.0,0,0,7.225,Third,unknown,Cherbourg,y'
b'1,male,28.0,0,0,35.5,First,A,Southampton,y'
b'1,female,38.0,1,5,31.3875,Third,unknown,Southampton,n'
从csv格式构造Dataset
除了TFRecord和txt格式,还有csv格式也很流行。csv格式能够以纯文本保存表格数据。pandas的to_csv是将csv搬运到内存的良好工具。
titanic_file = tf.keras.utils.get_file("train.csv", "https://storage.googleapis.com/tf-datasets/titanic/train.csv")
df = pd.read_csv(titanic_file, index_col=None)
df.head()

titanic_slices = tf.data.Dataset.from_tensor_slices(dict(df))

for feature_batch in titanic_slices.take(1):
  for key, value in feature_batch.items():
    print("  {!r:20s}: {}".format(key, value))
当然tf.data强大之处在于可以处理pandas处理不了的文件大小。experimental.make_csv_dataset函数是用于读取csv文件集的高层接口,它可以自动推导每个column的文件类型。
titanic_batches = tf.data.experimental.make_csv_dataset(
    titanic_file, batch_size=4,
    label_name="survived")
查看第一个batch的内容。
for feature_batch, label_batch in titanic_batches.take(1):
  print("'survived': {}".format(label_batch))
  print("features:")
  for key, value in feature_batch.items():
    print("  {!r:20s}: {}".format(key, value))
如果只需要csv的某一列,那么可以使用select_columns参数。
titanic_batches = tf.data.experimental.make_csv_dataset(
    titanic_file, batch_size=4,
    label_name="survived", select_columns=['class', 'fare', 'survived'])

for feature_batch, label_batch in titanic_batches.take(1):
  print("'survived': {}".format(label_batch))
  for key, value in feature_batch.items():
    print("  {!r:20s}: {}".format(key, value))

'survived': [1 1 1 0]
features:
  'sex'               : [b'female' b'female' b'male' b'female']
  'age'               : [35. 31. 45. 28.]
  'n_siblings_spouses': [0 1 0 8]
  'parch'             : [0 1 0 2]
  'fare'              : [512.3292  20.525    8.05    69.55  ]
  'class'             : [b'First' b'Third' b'Third' b'Third']
  'deck'              : [b'unknown' b'unknown' b'unknown' b'unknown']
  'embark_town'       : [b'Cherbourg' b'Southampton' b'Southampton' b'Southampton']
  'alone'             : [b'y' b'n' b'y' b'n']
还有一个底层的experimental.CsvDataset类,它可以更精细的控制读取csv的过程。不支持列类型推断。
titanic_types  = [tf.int32, tf.string, tf.float32, tf.int32, tf.int32, tf.float32, tf.string, tf.string, tf.string, tf.string]
dataset = tf.data.experimental.CsvDataset(titanic_file, titanic_types , header=True)

for line in dataset.take(10):
  print([item.numpy() for item in line])

[0, b'male', 22.0, 1, 0, 7.25, b'Third', b'unknown', b'Southampton', b'n']
[1, b'female', 38.0, 1, 0, 71.2833, b'First', b'C', b'Cherbourg', b'n']
[1, b'female', 26.0, 0, 0, 7.925, b'Third', b'unknown', b'Southampton', b'y']
[1, b'female', 35.0, 1, 0, 53.1, b'First', b'C', b'Southampton', b'n']
[0, b'male', 28.0, 0, 0, 8.4583, b'Third', b'unknown', b'Queenstown', b'y']
[0, b'male', 2.0, 3, 1, 21.075, b'Third', b'unknown', b'Southampton', b'n']
[1, b'female', 27.0, 0, 2, 11.1333, b'Third', b'unknown', b'Southampton', b'n']
[1, b'female', 14.0, 1, 0, 30.0708, b'Second', b'unknown', b'Cherbourg', b'n']
[1, b'female', 4.0, 1, 1, 16.7, b'Third', b'G', b'Southampton', b'n']
[0, b'male', 20.0, 0, 0, 8.05, b'Third', b'unknown', b'Southampton', b'y']
CsvDataset还可以指定每列的默认值,供元素为空时填充。
在Colab中,直接书写csv文件:
%%writefile missing.csv
1,2,3,4
,2,3,4
1,,3,4
1,2,,4
1,2,3,
,,,
设置每列默认值:
# Creates a dataset that reads all of the records from two CSV files, each with
# four float columns which may have missing values.

record_defaults = [999,999,999,999]
dataset = tf.data.experimental.CsvDataset("missing.csv", record_defaults)
dataset = dataset.map(lambda *items: tf.stack(items))

for line in dataset:
  print(line.numpy())

[1 2 3 4]
[999   2   3   4]
[  1 999   3   4]
[  1   2 999   4]
[  1   2   3 999]
[999 999 999 999]
你也可以选择删除header,或者指定某列输出
# Creates a dataset that reads all of the records from two CSV files with
# headers, extracting float data from columns 2 and 4.
record_defaults = [999, 999] # Only provide defaults for the selected columns
dataset = tf.data.experimental.CsvDataset("missing.csv", record_defaults, select_cols=[1, 3])
dataset = dataset.map(lambda *items: tf.stack(items))

for line in dataset:
  print(line.numpy())
[2 4]
[2 4]
[999   4]
[2 4]
[  2 999]
[999 999]
从文件夹中的每个文件构造Dataset
如果每个单独的文件都是一个数据项(比如图片数据集),这样的数据集如何整理?
flowers_root = tf.keras.utils.get_file(
    'flower_photos',
    'https://storage.googleapis.com/download.tensorflow.org/example_images/flower_photos.tgz',
    untar=True)
flowers_root = pathlib.Path(flowers_root)

list_ds = tf.data.Dataset.list_files(str(flowers_root/'*/*'))

for f in list_ds.take(5):
  print(f.numpy())

b'/root/.keras/datasets/flower_photos/dandelion/8720503800_cab5c62a34.jpg'
b'/root/.keras/datasets/flower_photos/dandelion/16510864164_3afa8ac37f.jpg'
b'/root/.keras/datasets/flower_photos/tulips/7136973281_b2a935ce20.jpg'
b'/root/.keras/datasets/flower_photos/sunflowers/14623719696_1bb7970208_n.jpg'
b'/root/.keras/datasets/flower_photos/dandelion/4560663938_3557a1f831.jpg'
通过使用tf.io.read_file读取数据,并从路径中提取label,返回(image, label)数据对。
def process_path(file_path):
  label = tf.strings.split(file_path, os.sep)[-2]
  return tf.io.read_file(file_path), label

labeled_ds = list_ds.map(process_path)

for image_raw, label_text in labeled_ds.take(1):
  print(repr(image_raw.numpy()[:100]))
  print()
  print(label_text.numpy())

b'\xff\xd8\xff\xe0\x00\x10JFIF\x00\x01\x01\x01\x03|\x03|\x00\x00\xff\xe2\x0cXICC_PROFILE\x00\x01\x01\x00\x00\x0cHLino\x02\x10\x00\x00mntrRGB XYZ \x07\xce\x00\x02\x00\t\x00\x06\x001\x00\x00acspMSFT\x00\x00\x00\x00IEC sRGB\x00\x00\x00\x00\x00\x00'

b'sunflowers'
批处理数据集元素
批处理的最简单形式是将数据集的n个连续元素堆叠为单个元素。
batched_dataset = dataset.batch(4)
最后一个批次可能未满,使用drop_remainder参数忽略最后一批,使得shape完整:
batched_dataset = dataset.batch(7, drop_remainder=True)
batched_dataset
许多模型(例如序列模型)都可以使用大小可变(例如长度不同的序列)的输入数据。通过Dataset.padded_batch可以将不同长度的tensor转换成一个batch。
在多个epochs的情况下,需要重复迭代数据集,最简单的方法是将数据集重复epochs遍。可以使用 Dataset.repeat()完成。
原有的titanic_lines数据集中的数据数量为 628
count = 0
for data in titanic_lines:
    count += 1
    # print(data.numpy())
print(count)
titanic_lines数据集经过repeat之后数目变为原来的两倍,1256
count = 0
for data in titanic_lines.repeat(2):
    count += 1
    # print(data.numpy())
print(count)
将数据集打散的方法 Dataset.shuffle() 通过维护一个固定大小的缓冲区来实现。
dataset = tf.data.Dataset.zip((counter, lines))
dataset = dataset.shuffle(buffer_size=100)
dataset = dataset.batch(20)
由于buffer_size为100,而批大小为20,因此第一批不包含索引大于120的元素。
在实际使用中,repeat操作、batch操作和shuffle操作经常一起混用,但是一定要注意操作的先后顺序。
预处理数据
Dataset.map(f) 通过函数 f 对数据集执行变换,f 必须以单个Tensor为输入,单个Tensor为输出(这里指的单个tensor,其意思是由原始数据和标签组成的数据对)。
假设我们定义了单个图像变换函数 parse_image ,只需 images_ds = list_ds.map(parse_image) 即可对 image_ds 数据集中的所有图片执行变换了。
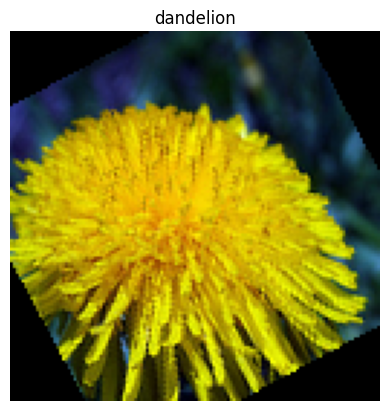
假设我们需要将照片随机旋转,可以定义函数,然后使用map将其应用于数据集的所有图片上。
import scipy.ndimage as ndimage

def random_rotate_image(image):
  image = ndimage.rotate(image, np.random.uniform(-30, 30), reshape=False)
  return image

image, label = next(iter(images_ds))
image = random_rotate_image(image)
show(image, label)
这里使用的是 scipy 中的旋转函数,需套用 tf.py_function() 才能在Tensorflow的eager_mode里面使用。
接下来使用 Dataset.map :
def tf_random_rotate_image(image, label):
  im_shape = image.shape
  [image,] = tf.py_function(random_rotate_image, [image], [tf.float32])
  image.set_shape(im_shape)
  return image, label
在函数内部不但要注意输入和返回值是(image, label),而且需要描述数据的shape和type,方便调试。
时间序列数据窗口化
时间序列数据的标签有所不同,一般以下一时刻的输入数据为标签,对未来进行一步一步的密集预测。比如:
range_ds = tf.data.Dataset.range(100000)

batches = range_ds.batch(10, drop_remainder=True)

def dense_1_step(batch):
  # Shift features and labels one step relative to each other.
  return batch[:-1], batch[1:]

predict_dense_1_step = batches.map(dense_1_step)

for features, label in predict_dense_1_step.take(3):
  print(features.numpy(), " => ", label.numpy())

[0 1 2 3 4 5 6 7 8]  =>  [1 2 3 4 5 6 7 8 9]
[10 11 12 13 14 15 16 17 18]  =>  [11 12 13 14 15 16 17 18 19]
[20 21 22 23 24 25 26 27 28]  =>  [21 22 23 24 25 26 27 28 29]
如果要预测整个时间窗口而不是固定的偏移量,比如
batches = range_ds.batch(15, drop_remainder=True)

def label_next_5_steps(batch):
  return (batch[:-5],   # Take the first 5 steps
          batch[-5:])   # take the remainder

predict_5_steps = batches.map(label_next_5_steps)

for features, label in predict_5_steps.take(3):
  print(features.numpy(), " => ", label.numpy())

[0 1 2 3 4 5 6 7 8 9]  =>  [10 11 12 13 14]
[15 16 17 18 19 20 21 22 23 24]  =>  [25 26 27 28 29]
[30 31 32 33 34 35 36 37 38 39]  =>  [40 41 42 43 44]
或者一个批次的标签和下个批次的输入有重叠:
feature_length = 10
label_length = 5

features = range_ds.batch(feature_length, drop_remainder=True)
labels = range_ds.batch(feature_length).skip(1).map(lambda labels: labels[:-5])

predict_5_steps = tf.data.Dataset.zip((features, labels))

for features, label in predict_5_steps.take(3):
  print(features.numpy(), " => ", label.numpy())

[0 1 2 3 4 5 6 7 8 9]  =>  [10 11 12 13 14]
[10 11 12 13 14 15 16 17 18 19]  =>  [20 21 22 23 24]
[20 21 22 23 24 25 26 27 28 29]  =>  [30 31 32 33 34]
有更方便的方法,那就是使用Dataset.window方法
def make_window_dataset(ds, window_size, shift, stride):
  windows = ds.window(window_size, shift=shift, stride=stride)

  def sub_to_batch(sub):
    return sub.batch(window_size, drop_remainder=True)

  windows = windows.flat_map(sub_to_batch)
  return windows
Dataset.window(window_size, shift=shift, stride=stride) 中的window_size代表窗口大小,即每个batch的元素个数;shift代表每次窗口移动的距离;stride代表选择元素的间隔
ds = make_window_dataset(range_ds, window_size=10, shift = 5, stride=3)

for example in ds.take(10):
  print(example.numpy())

[ 0  3  6  9 12 15 18 21 24 27]
[ 5  8 11 14 17 20 23 26 29 32]
[10 13 16 19 22 25 28 31 34 37]
[15 18 21 24 27 30 33 36 39 42]
[20 23 26 29 32 35 38 41 44 47]
[25 28 31 34 37 40 43 46 49 52]
[30 33 36 39 42 45 48 51 54 57]
[35 38 41 44 47 50 53 56 59 62]
[40 43 46 49 52 55 58 61 64 67]
[45 48 51 54 57 60 63 66 69 72]
提取这些数据的标签方法:
dense_labels_ds = ds.map(dense_1_step)

for inputs,labels in dense_labels_ds.take(3):
  print(inputs.numpy(), "=>", labels.numpy())

[ 0  3  6  9 12 15 18 21 24] => [ 3  6  9 12 15 18 21 24 27]
[ 5  8 11 14 17 20 23 26 29] => [ 8 11 14 17 20 23 26 29 32]
[10 13 16 19 22 25 28 31 34] => [13 16 19 22 25 28 31 34 37]
重采样
有一些数据集,不同类别的数据分布不均匀。这个时候需要对那些不足的类别进行重采样。
给定信用卡欺诈(二分类)数据集,下面首先检查数据集中不同类别的占比
def count(counts, batch):
  features, labels = batch
  class_1 = labels == 1
  class_1 = tf.cast(class_1, tf.int32)

  class_0 = labels == 0
  class_0 = tf.cast(class_0, tf.int32)

  counts['class_0'] += tf.reduce_sum(class_0)
  counts['class_1'] += tf.reduce_sum(class_1)

  return counts

counts = creditcard_ds.take(10).reduce(
    initial_state={'class_0': 0, 'class_1': 0},
    reduce_func = count)

counts = np.array([counts['class_0'].numpy(),
                   counts['class_1'].numpy()]).astype(np.float32)

fractions = counts/counts.sum()
print(fractions)

[0.9953 0.0047]
偏差很大,这样训练的二分类器只需全预测为正类,即可达到99.53%的正确率。
重采样数据集的一种方法是使用sample_from_datasets 。当每个类都有单独的data.Dataset时,此方法更适用。
正类和反类分别构建 Dataset
negative_ds = (
  creditcard_ds
    .unbatch()
    .filter(lambda features, label: label==0)
    .repeat())
positive_ds = (
  creditcard_ds
    .unbatch()
    .filter(lambda features, label: label==1)
    .repeat())
要使用tf.data.experimental.sample_from_datasets传递数据集以及每个数据集的权重
balanced_ds = tf.data.experimental.sample_from_datasets(
    [negative_ds, positive_ds], [0.5, 0.5]).batch(10)

for features, labels in balanced_ds.take(10):
  print(labels.numpy())

[0 1 1 0 0 1 0 1 0 0]
[0 1 0 1 1 0 0 1 1 0]
[1 1 1 0 0 1 1 0 1 1]
[0 0 0 0 1 1 0 0 1 0]
[0 1 1 0 0 0 1 0 0 0]
[1 1 0 0 0 0 0 0 0 0]
[0 1 0 1 1 0 0 1 1 1]
[0 0 1 0 1 0 1 0 1 1]
[1 0 1 1 0 1 0 0 1 0]
[0 0 0 1 1 1 1 0 1 1]
现在数据集就平衡了。
上述experimental.sample_from_datasets方法的一个问题是,每个类需要一个单独的tf.data.Dataset。
可以将data.experimental.rejection_resample函数应用于数据集,它仅加载一次,通过将多余元素将从数据集中删除以实现平衡。
data.experimental.rejection_resample采用class_func参数,用于标记每个数据集元素所属的类别。
由于Dataset已经是(features, label)标记好的状态,因此只需
def class_func(features, label):
  return label
重采样器输入的数据不能为batch后的Dataset,必须经过unbatch。重采样器还需要目标分布,以及可选的初始分布估计。最后经过map中的函数,直接删除掉extra_label即可。
resampler = tf.data.experimental.rejection_resample(
    class_func, target_dist=[0.5, 0.5], initial_dist=fractions)

resample_ds = creditcard_ds.unbatch().apply(resampler).batch(10)

balanced_ds = resample_ds.map(lambda extra_label, features_and_label: features_and_label)
数据集迭代器的checkpoint
没想到吧?不只是模型能使用checkpoint,Dataset的处理过程也可以使用checkpoint。如果您有一个很大的数据集,并且不想在每次重新启动时都从头开始,则这可能很有用。但是请注意,迭代器检查点可能很大,因为诸如shuffle和prefetch需要迭代器中的缓冲元素。
下面是示例:
range_ds = tf.data.Dataset.range(20)

iterator = iter(range_ds)
ckpt = tf.train.Checkpoint(step=tf.Variable(0), iterator=iterator)
manager = tf.train.CheckpointManager(ckpt, '/tmp/my_ckpt', max_to_keep=3)

print([next(iterator).numpy() for _ in range(5)])
[0, 1, 2, 3, 4]

save_path = manager.save()

print([next(iterator).numpy() for _ in range(5)])
[5, 6, 7, 8, 9]

ckpt.restore(manager.latest_checkpoint)

print([next(iterator).numpy() for _ in range(5)])
[5, 6, 7, 8, 9]
在Keras中使用tf.data
数据集的处理:
train, test = tf.keras.datasets.fashion_mnist.load_data()

images, labels = train
images = images/255.0
labels = labels.astype(np.int32)

fmnist_train_ds = tf.data.Dataset.from_tensor_slices((images, labels))
fmnist_train_ds = fmnist_train_ds.shuffle(5000).batch(32)
模型构建:
model = tf.keras.Sequential([
  tf.keras.layers.Flatten(),
  tf.keras.layers.Dense(10)
])

model.compile(optimizer='adam',
              loss=tf.keras.losses.SparseCategoricalCrossentropy(from_logits=True),
              metrics=['accuracy'])
模型训练:
model.fit(fmnist_train_ds, epochs=2)
如果在fit过程中你要对Dataset进行repeat,只需指定每个epochs使用的数据个数,然后不给repeat指定参数,数据集就会变成无限个,一定会满足epochs的要求。
model.fit(fmnist_train_ds.repeat(), epochs=2, steps_per_epoch=20)
同理,evaluate时也是一样的
loss, accuracy = model.evaluate(fmnist_train_ds.repeat(), steps=10)
print("Loss :", loss)
print("Accuracy :", accuracy)
Loss : 0.3501795828342438
Accuracy : 0.8968750238418579
总结
如果在使用机器学习算法解决问题过程中,数据预处理是主要问题的话,采用合适的数据组织手段可以帮助解决问题。 tf.data 能够快速处理大量数据,并将各个来源的数据归一化成合适的 Dataset 格式。
你可以对构建好的 tf.data.Dataset 做预处理操作,比如随机打乱、分批次、规划时间窗口、重采样等等。
经过处理后的 Dataset 对象可以直接输入到keras进行训练。
notes Tensorflow preprocessing
本博客所有文章除特别声明外,均采用 CC BY-SA 3.0协议 。转载请注明出处!